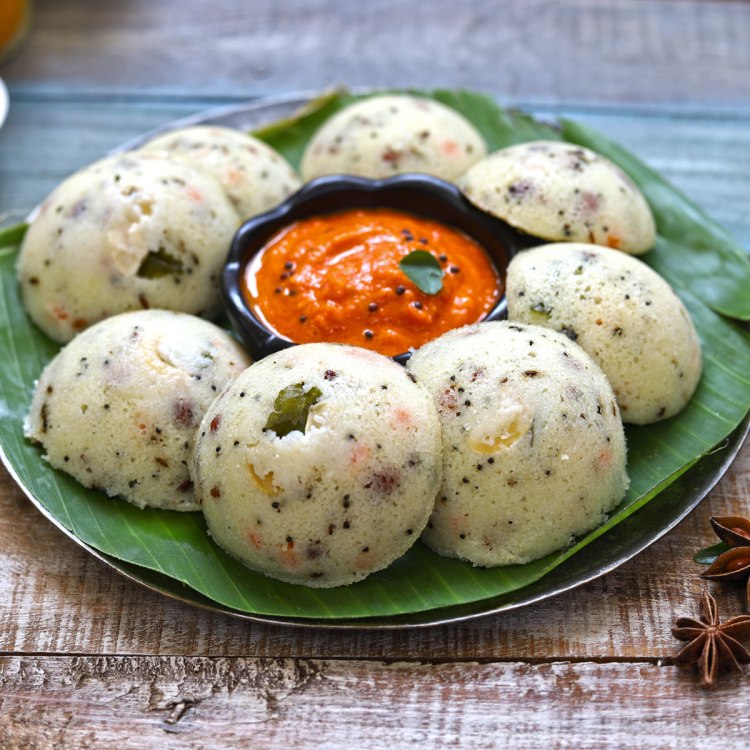
RAVA IDLI
Traditionally, idli is made from rice and lentils, which involves soaking the rice and lentils for 4 to 5 hours as well as grinding the lentils and then fermenting the batter.
As this recipe uses rava (cream of wheat), yogurt and a leavening agent instead, we do not need all that soaking or grinding time, thus making this an instant recipe.
The rava idli batter gets made within minutes and then, as the idli is steaming, I prepare the coconut chutney, which is the traditional dip to serve with idli.
Prep Time 30 mins
Cuisine South Indian
Cooking Time 15Mins
Diet Vegetarian
Total Time 45mins
Servings 10 rava Idlis
INGREDIENTS
For Batter
- Finely grated carrots – 2 tsp (optional)
- Chopped coriander leaves- 2tsp
- ½ teaspoon salt or add as required
- Rava (sooji, semolina, cream of wheat)-1cup
- Curd (yogurt)- ½ cup
- ½ to ¾ cup water or add as required
- 2 to 3 pinches of baking soda or ¼ teaspoon
For Frying & Roasting
- Ghee (clarified butter)-2 tablespoons
- cashews- 14 halved
- mustard seeds- ½ teaspoon
- chana dal (husked and split bengal gram or split & husked chickpeas)-1 teaspoon
- cumin seeds- ½ teaspoon
- curry leaves – chopped- 10
- finely chopped ginger-1 teaspoon or 1 inch
- green chilli – finely chopped- 1
INSTRUCTIONS
- Heat 2 tablespoons ghee in a pan. Keep the heat to low or medium-low. Add 14 halved cashews.
- Stirring often fry the cashews till golden. Remove with a slotted spoon draining the ghee and keep aside. Reduce the heat to low or medium-low.
- To the same pan add ½ teaspoon mustard seeds. Let the mustard seeds begin to splutter.
- When the mustard seeds begin to splutter add 1 teaspoon chana dal (husked and split bengal gram).
- Stirring often fry chana dal till they look golden and crunchy. Then add ½ teaspoon cumin seeds and fry for 4 to 5 seconds.
- Now add 10 to 12 curry leaves (chopped), 1 pinch asafoetida (hing), 1 teaspoon finely chopped ginger and 1 green chilli (finely chopped).
- Mix well and fry for about 10 seconds. Keep the heat to a low.
- Now add 1 cup rava (finer variety of cream of wheat, suji, semolina).
- Mix the rava very well with the ghee and other ingredients.
- Roast rava till it become aromatic, changes color a bit (but should not get browned or golden) and the grains look separate. Keep on stirring often when roasting rava.
- Roasting rava will takes about 5 to 7 minutes depending on the thickness and heaviness of the pan and the flame intensity. Once the rava is well roasted, keep the pan aside. Let the rava become warm.
- To the roasted rava, add 2 tablespoons finely grated carrots, 2 tablespoons chopped coriander leaves and ½ teaspoon salt or add as required.
- If adding any other grated veggies or steamed peas then add them at this step.
- Next add ½ cup curd (yogurt) and ½ to ¾ cup water. Depending on the quality of rava and the thickness of curd, you can adjust the water.
- Tip 1: If the curd is liquid and has whey in it, then add ½ cup water.
- Tip 2: If the curd is very thick, then add ¾ cup water. Basically you need to get a medium consistency batter.
- Mix very well and let the batter rest covered for 20 minutes. The rava idli batter is neither thick nor thin in consistency and has a medium consistency.
- Brush oil or ghee on the idli pan moulds. Place a fried halved cashew in the center of the moulds.
- Before you add eno or baking soda to the batter, take 2 to 2.5 cups water in a pot. Keep a small length trivet stand or a rack in the pot. Heat the water till it comes to a boil.
- After 20 minutes this is the consistency of the batter after resting. If in case the batter looks thick, then add 1 to 2 tablespoons of water to get a medium consistency.
- Rava absorbs water and so the batter might thicken after 20 minutes. If the curd is thick, then also you may need to add more water. If you have added more water in the beginning, you do not need to add any water at this step.
- Sprinkle ¼ teaspoon baking soda evenly over the batter.
- Quickly mix very well.
- Pour the batter in the idli moulds.
- Stack the each idli plate and place them in the pot with the hot water. Cover with a lid and steam rava idli for 10 to 12 minutes.
- I have used the Instant Pot for steaming and had set the time for 10 minutes (check notes section in recipe card on finer details for steaming in the IP as well as pressure cooker and pan).
- Keep a stop-watch or timer to check the time as Instant Pot does not beep in the steaming mode after the steaming time is over. It will continue to steam further.
- You can even steam rava idli in an electric cooker, pan or pressure cooker for 10 to 12 minutes.
- To check the doneness, a toothpick or wooden skewer inserted in the rava idli should come out clean.
- Remove the idli plates carefully and let them rest for 3 to 4 minutes. Then with a spoon remove the rava idli.
- Serve the steaming hot Rava Idli with Idli Sambar and your favorite Coconut Chutney.
- Serving Suggestions
- Coconut Chutney: Rava idli tastes amazing served with coconut chutney. I have served rava idli with cilantro coconut chutney.
- Sambar: Rava Idli also tastes good with Sambar – a vegetable stew cooked with dal, veggies and tamarind.
- Potato Sagu: Both rava idli and potato sagu is a great combination.Potato sagu is a lightly spiced potato curry from the Karnataka cuisine.
- Idli Podi: Idli podi makes for a good side with rava idli. Idli Podi is a dry powder made with lentils and red chilies and has a spicy, earthy flavor along with a somewhat crunchy texture. Sesame oil or ghee is then mixed with the idli podi to make a delicious paste to dip the idli in.
Tips
- Leavening Agent: If you use baking soda, then add ¼ teaspoon (2 to 3 pinches) of it in the batter. The spices and herbs also add a lot of flavorings of their own in the recipe.
- Veggies: I have also added some grated carrots to the batter which you can skip. You can even add steamed green peas. Just boil the peas beforehand and also grate the veggies ahead of time so they are ready to add.
- Curd (Yogurt): I have used fresh curd. You can use either fresh or sour curd to make the idli.
About Me
Welcome to my kitchen! I am Aroma, the food blogger behind Aroma Cook Book. The blog launched in 2020 as a place to share my passion for cooking. I love trying new things and testing them out with my family. Each recipe is tried and true, family-tested. Inspired by cookbooks, other food blogs, magazines, and family recipes, I try to make practical and easy family friendly recipes on my site that can bring your family together at the dinning table. My Family enjoy cooking in the kitchen with me and helping to create delicious recipes to share.
